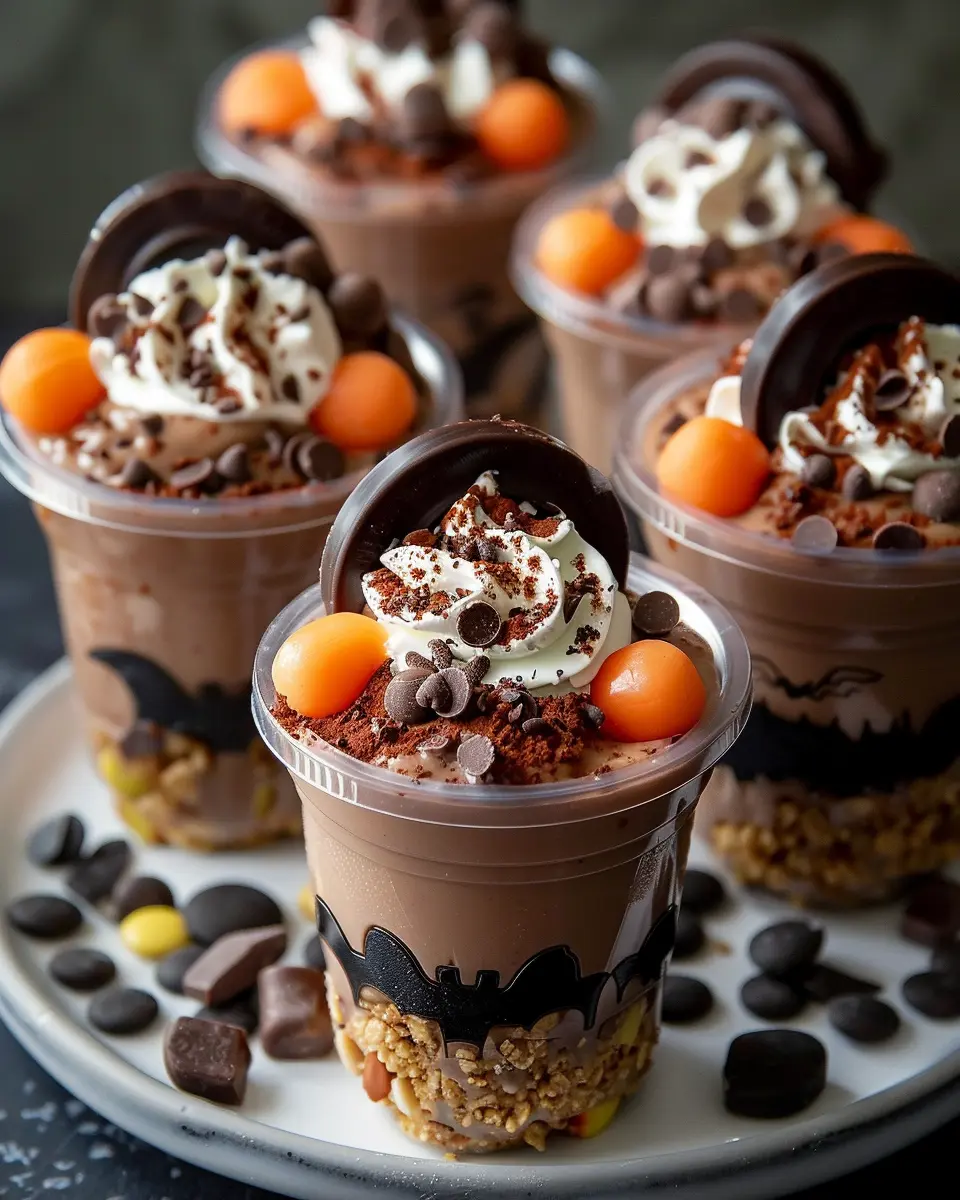
Introduction to Spooky Graveyard Pudding Cups
Halloween isn’t just about costumes and candy; it’s also an opportunity to let your creativity shine in the kitchen. If you’re searching for a fun, festive treat that’s sure to impress your friends, look no further than spooky graveyard pudding cups. Not only do these cups taste delicious, but they also add an eerie yet playful touch to any Halloween gathering. Whether you’re hosting a party or just want to indulge in some sweet seasonal fun, these pudding cups are a perfect choice.
What makes spooky graveyard pudding cups so special? First, they’re incredibly versatile. You can customize them with various flavors, whether you prefer classic chocolate or something more adventurous like pumpkin spice. Additionally, they’re easy to prepare and can be made ahead of time, leaving you free to enjoy Halloween festivities without the last-minute stress of cooking.
Beyond their taste and convenience, these pudding cups offer an engaging DIY element. Have you ever seen the delight on a friend’s face when they realize they can create their own edible graveyard? It’s not just a dessert; it’s an experience! Adding gummy worms, cookie crumbles as “dirt,” and festive decorations allows everyone to get involved. You can even challenge guests to create the spookiest graveyard for a fun and interactive aspect to your gathering.
Curious more about how to rock your Halloween party? Check out resources like the National Retail Federation for ideas on spooky themes and trends. And did you know that about 70% of people enjoy creating homemade treats during this season? It’s a delightful way to bring people together, foster creativity, and make lasting memories.
So, gather your ingredients, unleash your inner ghoul, and prepare to enchant your taste buds with these whimsical spooky graveyard pudding cups. They’re bound to be a crowd-pleaser, igniting laughter and smiles at every turn! With just a few easy steps, you can create the ultimate Halloween treat that sparks joy and indulgence. Ready to dive in? Let’s get started!
Ingredients for Spooky Graveyard Pudding Cups
Essential Ingredients for Creepy Goodness
Creating your spooky graveyard pudding cups starts with some simple yet essential ingredients that transform ordinary snacks into frightful delights!
- Chocolate Pudding: A must-have base that brings a rich and creamy texture.
- Crushed Oreos: For that classic graveyard look, crushed Oreos mimic soil perfectly.
- Gummy Worms: Nothing says ‘creepy’ like some squiggly gummy creatures peeking out!
- Pudding Cups or Clear Cups: Transparent cups let you showcase the layers and let your creativity shine.
These essentials set the stage for a Halloween treat that’s as fun to create as it is to devour. Have you ever thought about how easy it is to elevate simple treats? For kids of all ages, these pudding cups become an interactive project that brings everyone together.
Optional Ingredients for Extra Spookiness
Want to elevate your spooky graveyard pudding cups even further? Here are some fun add-ons to consider:
- Turkey Bacon Crumbles: Add a dash of savory with crumbled turkey bacon that resembles grave markers.
- Chocolate Bar Tombstones: Customize with candy markers for a more authentic graveyard look.
- Green Colored Coconut Flakes: For that eerie grass effect on top, consider adding green coconut!
Feel free to mix and match these optional ingredients to create a graveyard scene that’s uniquely yours. For more creative tips and tricks, check out this fun blog for Halloween inspiration!
Now, grab your supplies and let’s dig into some deliciously spooky fun.
Preparing Spooky Graveyard Pudding Cups
As the leaves turn and the air gets crisp, it’s the perfect time to whip up some spooky graveyard pudding cups. These delightfully eerie treats are not only eye-catching but are also incredibly fun to make. Whether you’re hosting a Halloween party or just want a seasonal dessert, this recipe is sure to be a hit. Let’s walk through the steps in a way that makes them a piece of cake—or, should I say pudding?
Gather and Measure Your Ingredients
Before diving into the dessert-making frenzy, it’s essential to gather all your ingredients and measure them out. Here’s what you’ll need for your spooky graveyard pudding cups:
- Chocolate pudding mix (2 packets)
- Milk (4 cups, for the pudding)
- Chocolate sandwich cookies (1 package)
- Gummy worms (1 bag)
- Edible markers (for gravestone decoration)
- Clear plastic cups (or small jars for serving)
Take a moment to double-check your pantry; you might have some of these ingredients lying around. If you’re keen on exploring more Halloween treats, you can check out this guide for additional spooky inspiration.
Whisk the Chocolate Pudding Mix
With your ingredients at the ready, it’s time to create the pudding. In a mixing bowl, combine the chocolate pudding mix and milk. Using a whisk, stir vigorously for about 2 minutes until everything is well combined and begins to thicken. It’s a simple step, but don’t be surprised if you find yourself sampling a bit—it’s just too good to resist!
Create the “Dirt” with Crushed Cookies
While the pudding sets, grab your chocolate sandwich cookies. Place them in a zip-top bag, seal it tightly, and crush them using a rolling pin or even your hands until they resemble fine dirt. This “dirt” brings the graveyard theme to life and adds an extra crunch to your pudding cups.
Decorate Your Cookie Gravestones
Let’s get creative! Take a few cookies from your crushed batch and use edible markers to draw spooky messages like “RIP” or “Boo!” The personalization adds a charming touch. If you’re not into doodling, you can always leave them plain; they’ll still do the job.
Assemble the Pudding Cups
Now for the fun part: building your spooky graveyard pudding cups! Start by spooning a layer of the chocolate pudding into the bottom of your cups. Then, sprinkle a healthy layer of the crushed cookie “dirt” on top. Repeat these layers until your cups are full, finishing with the cookie dirt layer on top to create that perfect graveyard effect.
Add Gummy Worms and Other Tasty Decorations
No graveyard would be complete without some creepy crawlies! Add a couple of gummy worms poking out from the dirt as a fun and slightly spooky touch. You could even include some candy eyeballs or other Halloween-themed treats for added effect. It’s all about making them look as spooky as possible while still being delicious!
Chill and Prepare for Serving
Once your spooky graveyard pudding cups are assembled, pop them in the refrigerator for about an hour to chill. This helps the pudding set better and will make your treats even tastier when served. When it’s time to enjoy them, simply grab a cup, take a photo (because let’s be honest, they’re Instagram-worthy), and dig in!
There you have it—your very own spooky graveyard pudding cups! This recipe not only delights the taste buds but also offers plenty of opportunities for creativity and fun. Happy Halloween baking!
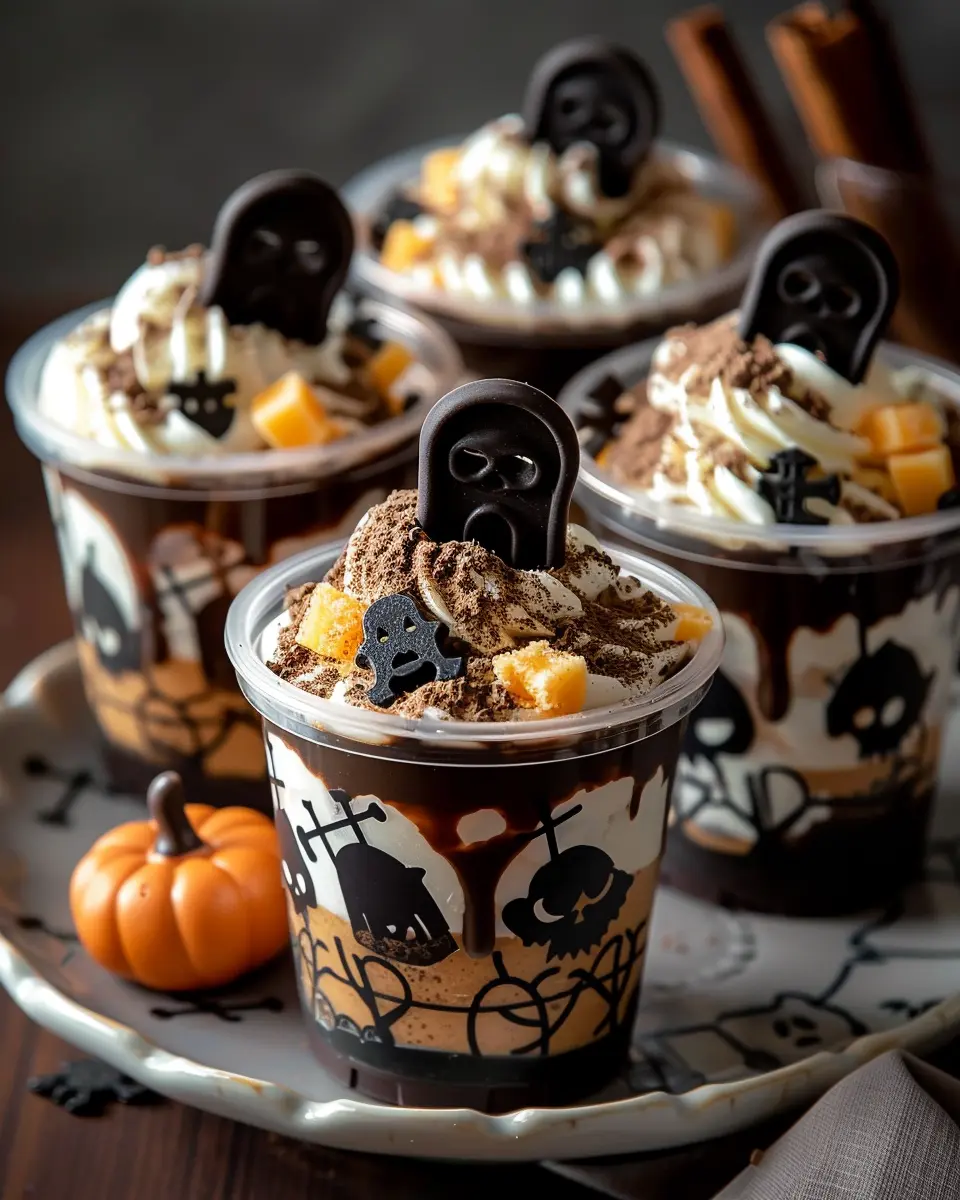
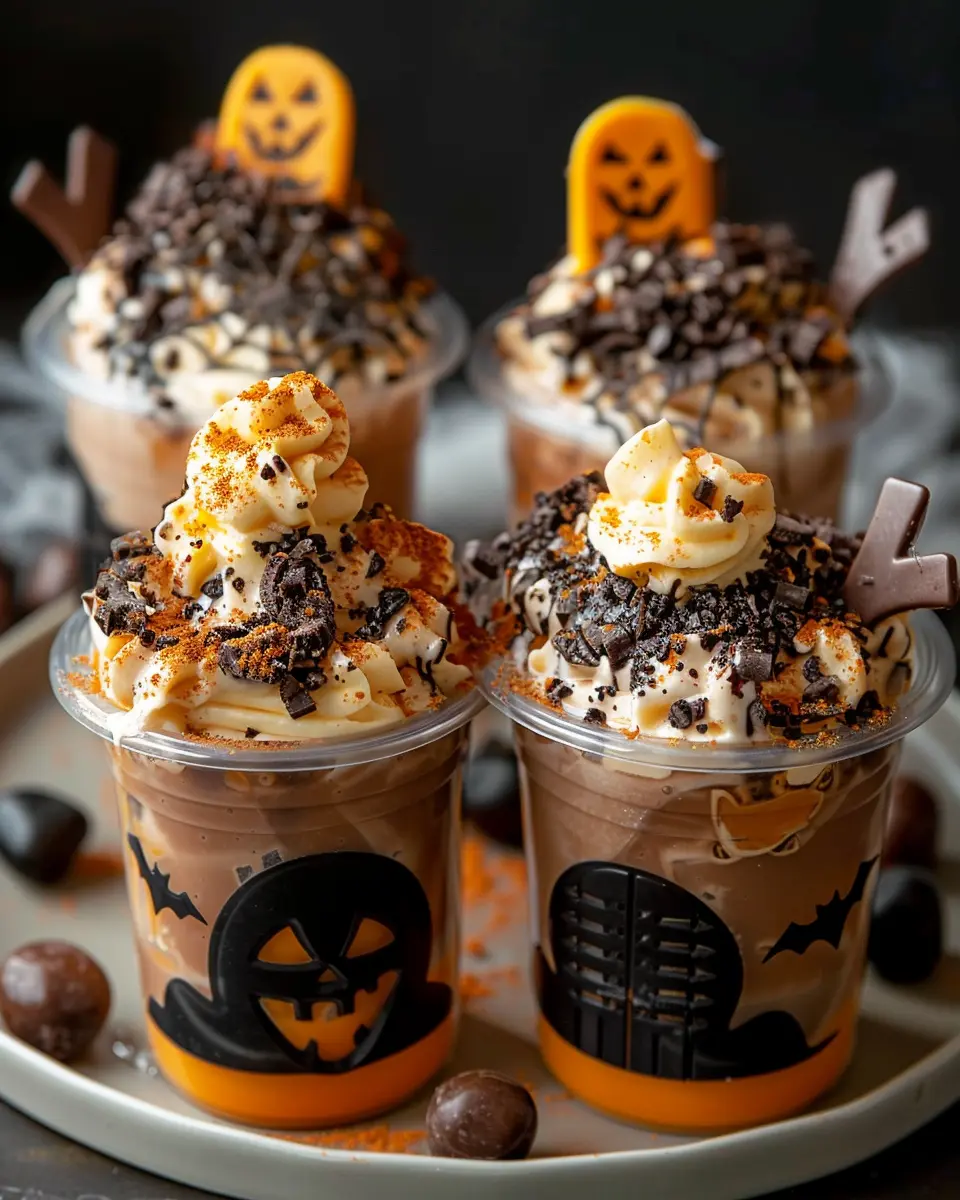
Variations on Spooky Graveyard Pudding Cups
Creating playful and spooky graveyard pudding cups is an enjoyable way to celebrate seasonal festivities. But why stick to just one flavor when the options are limitless? Let’s explore the possibilities!
Different Flavor Options for Your Pudding Cups
When it comes to pudding flavors, the sky is the limit. Here are a few variations to consider that can give your spooky graveyard pudding cups a fresh twist:
- Chocolate Pumpkin: Mix chocolate pudding with a hint of pumpkin spice for that autumn feel.
- Peanut Butter Delight: Blend peanut butter into vanilla pudding for a nutty surprise.
- Mint Chocolate: Add mint extract to green pudding for a refreshing kick that’s perfect for the spooky season.
- Caramel Apple: Layer in some caramel sauce to give apple-flavored pudding a deliciously sweet twist.
These flavors not only tantalize your taste buds but also add to the spooky fun!
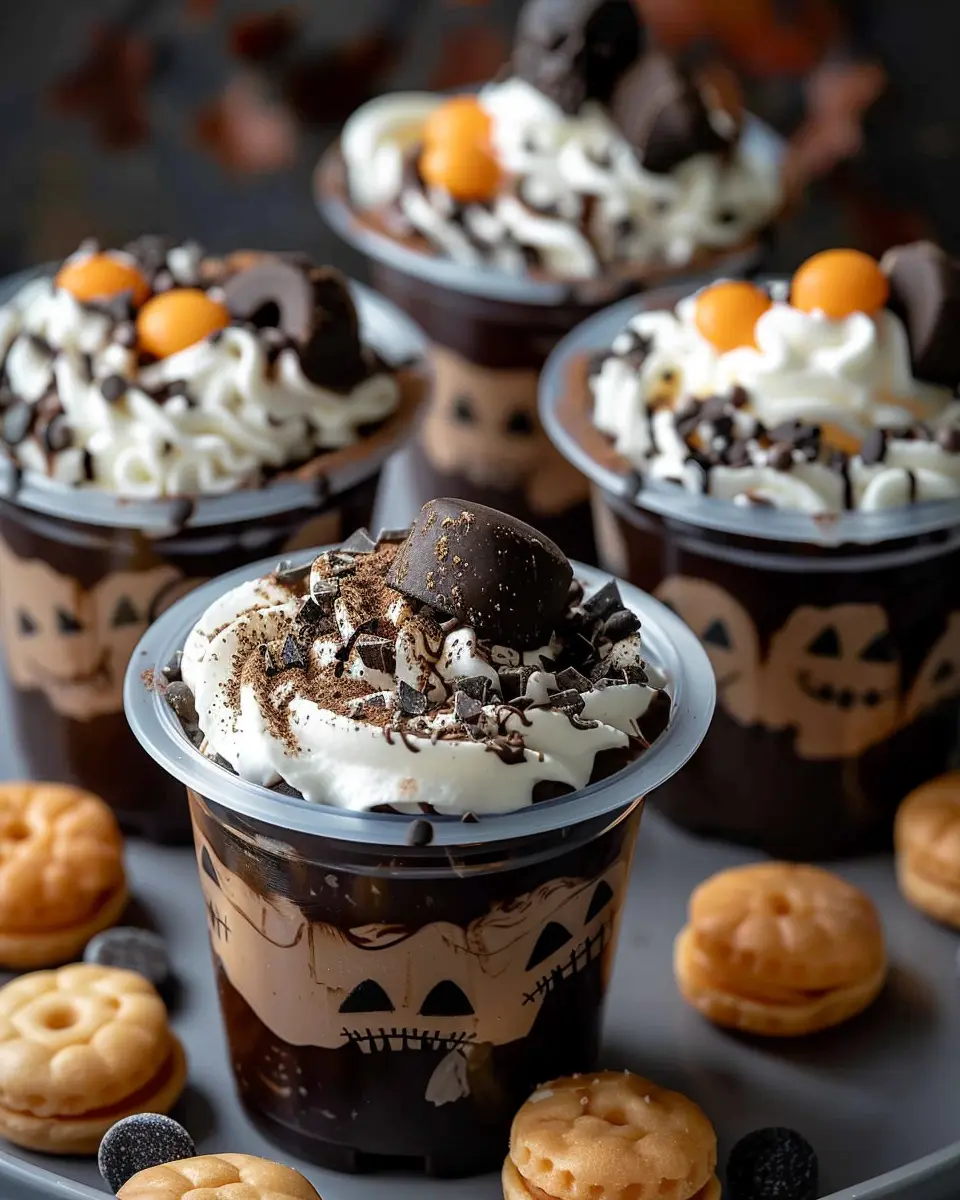
Creative Decorating Ideas for Personalization
Personalization makes every dessert special. Here are some fun ideas to make your spooky graveyard pudding cups uniquely yours:
- Gummy Worms: Drape gummy worms over the top, giving your pudding cups a creepy effect.
- Edible Dirt: Use crushed Oreos as “dirt” on top; it’s a traditional touch that never fails!
- Chocolate Tombstones: Create small tombstones from chocolate squares, and write funny epitaphs with edible ink.
- Whipped Ghosts: Top with whipped cream shaped like ghosts or use pre-made ghost candies to enhance the spook factor.
These creative touches not only make the dessert visually appealing but invite your guests to dig into the fun.
For more ideas on fun treats, check out sites like Food Network or Taste of Home. Remember, the best part about these spooky graveyard pudding cups is their adaptability. What flavor or decoration will you try next?
Cooking Tips and Notes for Spooky Graveyard Pudding Cups
Storage Tips for Freshness
When preparing your spooky graveyard pudding cups, proper storage is key to keeping them fresh and delicious. You can store your pudding cups in the refrigerator for up to three days. Just be sure to cover them with plastic wrap or a tight lid to prevent them from absorbing any other scents in your fridge. If you’re using cookie crumbles as soil, consider adding them right before serving—this will keep that delightful crunch intact!
Tricks for Easy Assembly
Assembling your pudding cups doesn’t have to be a daunting task. Here are some tips to make it a breeze:
- Prep Ingredients: Have all your ingredients ready to go before you start. A little organization goes a long way.
- Use Clear Cups: Opt for clear cups to showcase those layered pudding colors, creating a striking visual effect that’s perfect for a spooky theme.
- Get Creative: Don’t hesitate to mix and match toppings. Think gummy worms or candy eyeballs for added fright!
For more innovative dessert ideas, consider checking out this article on layering techniques to elevate your dessert game. And if you’re wondering about vegetarian or gluten-free adaptations, there are plenty of resources online to explore. Happy cooking!
Serving Suggestions for Spooky Graveyard Pudding Cups
Creative Ways to Present Your Pudding Cups
Creating spooky graveyard pudding cups for Halloween is not just about the flavors; it’s also about the presentation! Try using clear plastic cups or mini mason jars to showcase the layered look of your pudding. Top them with crumbled chocolate cookies to mimic dirt, and consider adding gummy worms or edible grave markers made from fondant for an extra creepy touch. The more creative and spooky, the better your dessert will crawl into the Halloween spirit!
Pairing Ideas to Make a Complete Halloween Dessert Table
To elevate your Halloween spread, pair your spooky graveyard pudding cups with other themed treats. Consider serving ghost-shaped cookies or pumpkin spice cupcakes for a delightful contrast to the rich pudding. A simple punch made with apple cider and ginger ale can refresh your guests between sweets. For a colorful touch, include fruit skewers with seasonal options like orange melon and grapes, balancing the indulgence of your desserts.
These thoughtful touches will not only entice your guests but also make your Halloween celebration memorable! If you’re seeking inspiration for more spooky treats, check out this classic Halloween recipe guide.
Time Breakdown for Spooky Graveyard Pudding Cups
Creating your Spooky Graveyard Pudding Cups is as delightfully easy as it is fun! Here’s how to manage your time effectively.
Preparation Time
Set aside about 15 minutes for the initial preparation. This includes mixing the pudding, layering the cups, and crafting your spooky decorations. It’s a quick process that allows you to tap into your creative side without feeling rushed!
Resting Time
Once you’ve assembled your pudding cups, let them chill in the fridge for at least 2 hours. This step is essential for allowing those flavors to meld and the pudding to set properly, ensuring every bite is the perfect consistency.
Total Time Commitment
In total, you’re looking at a time commitment of roughly 2 hours and 15 minutes. This includes prep and rest time. Perfect for a relaxed afternoon of fun! You can find more time-efficient recipes at sources like Cooking Light or Epicurious to complement your spooky desserts.
Whether it’s for a Halloween gathering or a cozy night in, these pudding cups will surely be a hit among friends and family!
Nutritional Facts for Spooky Graveyard Pudding Cups
Break Down of Calories
When it comes to Spooky Graveyard Pudding Cups, enjoy indulging without the guilt! Each serving packs around 200 calories. With layers of delicious pudding, crushed cookies, and a sprinkle of festive flair, these treats offer a satisfying mix of flavors and textures.
Key Nutritional Information
These delightful pudding cups provide not just sweetness but also some nutritional benefits:
- Fats: Approximately 8g per serving, mostly from the creamy pudding.
- Carbohydrates: Roughly 30g, with the cookies contributing to that delightful crunch.
- Proteins: Around 3g, thanks to the addition of milk in the pudding mix.
Choosing to make these spooky delights with healthier alternatives, like low-fat pudding mixes or reduced-sugar options, can further enhance their nutritional profile. For an in-depth look at balanced diets, check out resources from the USDA Dietary Guidelines.
Incorporating these fun and festive pudding cups into your celebrations adds a playful twist to healthy eating without sacrificing flavor. Who says dessert can’t be nutritious?
FAQs about Spooky Graveyard Pudding Cups
Creating spooky graveyard pudding cups for your next Halloween gathering? Here are some frequently asked questions to help you get the most out of this eerie dessert!
How can I make these pudding cups dairy-free?
Going dairy-free? No problem! You can swap regular chocolate pudding for a dairy-free alternative. Look for brands that use almond, coconut, or oat milk as their base. Many grocery stores now carry these options, making it easier than ever to whip up a creamy pudding without the dairy. Additionally, use dairy-free whipped topping to finish off your cups.
Can I prepare them ahead of time?
Absolutely! Spooky graveyard pudding cups are perfect for prep ahead of time. You can assemble the pudding layers and chill them in the fridge a day in advance. Just add the final touches, like the crumbled cookies and candy, right before serving to keep everything fresh and visually appealing. It’s a great way to relieve stress on party day!
What if I don’t have the specific candies listed?
If you’re missing some of the candies from the recipe, don’t fret! Halloween is all about creativity. Consider using different gummy candies, chocolate pieces, or even homemade cookie tombstones. You could visit local candy shops or check out websites like Candy Store where you’ll find a wide variety of options. Just ensure that whatever you use fits the spooky theme, and have fun with it!
We hope these FAQs help you craft the most riveting spooky graveyard pudding cups. Happy haunting!
Conclusion on Spooky Graveyard Pudding Cups
Summarizing the Delight of Homemade Halloween Treats
Creating spooky graveyard pudding cups not only adds a festive flair to your Halloween celebrations but also brings a sense of accomplishment. Imagine serving these delightful concoctions to friends and family, each bite filled with creamy layers and crunchy toppings that are sure to spark joy and nostalgia.
These treats are not just about taste; they also encourage creativity. From crafting tombstones to choosing fun ghoulish toppings, the possibilities are endless! So, whether you’re hosting a Halloween bash or enjoying a cozy night in, spooky graveyard pudding cups are your perfect go-to. Dive into the spirit of the season, and make lasting memories with every spoonful!
For more Halloween ideas, check out this source on seasonal treats for additional inspiration. Additionally, consider exploring creative food design to elevate your culinary skills!
PrintSpooky Graveyard Pudding Cups: A Fun and Easy Halloween Treat

A delicious and fun treat for Halloween that is easy to prepare.
- Prep Time: 15 minutes
- Total Time: 30 minutes
- Yield: 4 servings 1x
- Category: Dessert
- Method: No-bake
- Cuisine: American
- Diet: Vegetarian
Ingredients
- 2 cups chocolate pudding
- 1 cup crushed Oreo cookies
- 1 cup gummy worms
- 4 mini tombstone cookies
- 4 clear plastic cups
Instructions
- Prepare the chocolate pudding according to package instructions.
- Layer the chocolate pudding in each plastic cup.
- Add a layer of crushed Oreo cookies on top of the pudding.
- Add gummy worms and mini tombstone cookies on top as decoration.
- Chill in the refrigerator for 30 minutes before serving.
Notes
- For an extra spooky effect, add more gummy worms.
- Can be prepared a day in advance and stored in the refrigerator.
Nutrition
- Serving Size: 1 cup
- Calories: 250
- Sugar: 20g
- Sodium: 150mg
- Fat: 12g
- Saturated Fat: 7g
- Unsaturated Fat: 3g
- Trans Fat: 0g
- Carbohydrates: 30g
- Fiber: 1g
- Protein: 3g
- Cholesterol: 5mg
Keywords: Spooky Graveyard Pudding Cups, Halloween Treat, Easy Dessert