
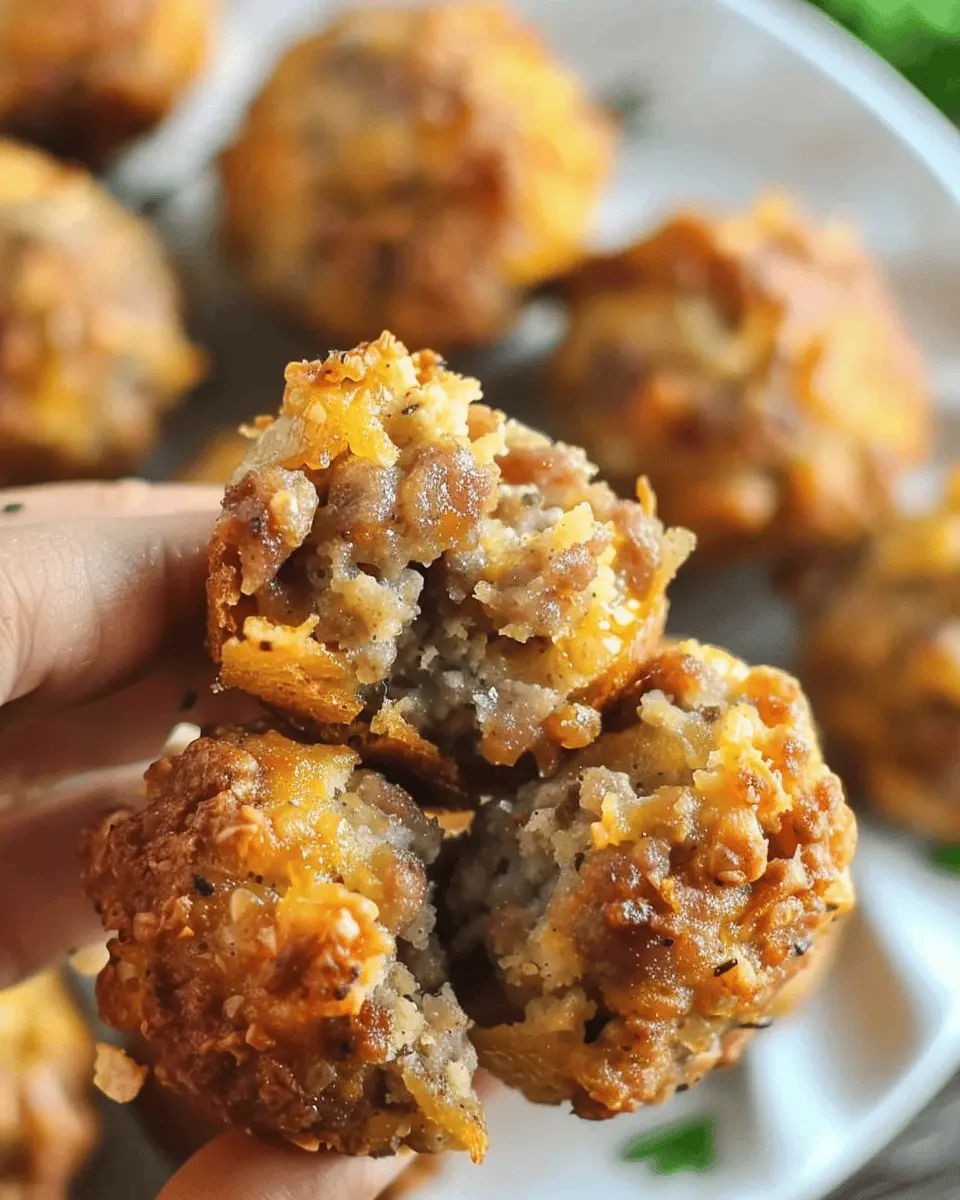
Introduction to Bisquick Sausage Balls
Looking for a quick and satisfying snack that’s perfect for busy weekdays or spontaneous gatherings? Enter Bisquick sausage balls! These delightful morsels are not only easy to whip up but also pack a flavorful punch that can appease even the pickiest of eaters.
Why Bisquick Sausage Balls Are a Game-Changer for Busy Professionals
For young professionals juggling work, social obligations, and personal life, preparing meals can often feel overwhelming. Enter Bisquick sausage balls, a convenient yet delicious option that simplifies your snacking needs. With only a few ingredients, you can create a batch of these savory bites in no time.
Imagine this: you arrive home after a long day and need a quick pick-me-up before diving into your evening projects. With these sausage balls, you have an effortless solution. Just bake a batch and have ready-to-eat snacks to grab whenever you need an energy boost. Plus, they can be served warm or at room temperature, making them perfect for any occasion—from casual get-togethers to game nights.
Preparing Bisquick sausage balls is as simple as mixing Bisquick mix, sausage (we recommend using turkey sausage for a leaner alternative), shredded cheese, and a few spices. Not only do they taste amazing, but you also get the satisfaction of making something with your own hands. These bites are versatile, too! Swap in different cheeses or experiment with ingredients like chicken ham or beef sausage to suit your tastes.
Did you know that incorporating protein-rich snacks can help sustain your energy levels throughout the day? In a fast-paced world where keeping your health in check is crucial, these sausage balls offer a wonderful source of protein that fits perfectly into your busy life.
Moreover, they’re easy to make in large batches, so you can always have something on hand. Whether you’re prepping for a party or just looking for a savory snack, Bisquick sausage balls are your secret weapon.
Ready to get started? Let’s dive into our easy-to-follow recipe that will surely enhance your snacking repertoire. Check out our full Bisquick sausage balls recipe for all the delicious details!
Ingredients for Bisquick Sausage Balls
Essential ingredients for the perfect sausage balls
Making Bisquick sausage balls is both fun and straightforward, requiring just a handful of essential ingredients. Here’s what you’ll need:
- Bisquick Mix: The star of the show, providing a fluffy texture.
- Ground Beef: Opt for a lean variety for a healthier twist.
- Turkey Bacon: Chopped into bits for that savory, smoky flavor.
- Shredded Cheese: Cheddar works wonderfully; it adds richness and binds everything together.
- Milk: A splash enhances the dough’s moisture and makes it easier to work with.
- Seasonings: Don’t forget the salt, pepper, and any additional spices you love!
These simple ingredients blend to create a snack that’s perfect for gatherings or cozy movie nights.
Possible substitutions for dietary needs
Worried about dietary restrictions? Don’t fret! Here are some great alternatives to keep your Bisquick sausage balls delicious:
- Gluten-Free: Swap Bisquick for a gluten-free baking mix.
- Meat Alternatives: Try using ground turkey or chicken for a leaner option, or even plant-based sausage for a vegetarian twist.
- Dairy-Free: Use a dairy-free cheese alternative and a nut milk for a lactose-free version.
Experimenting with these substitutions ensures everyone can enjoy this delightful dish. To learn more about ingredient substitutions, check out resources from the Academy of Nutrition and Dietetics.
Now that you have the ingredients down, let’s dive into the cooking process!
Preparing Bisquick Sausage Balls
Making Bisquick sausage balls is a delightful and straightforward process that requires minimal skill but yields maximum flavor. These savory bites are perfect for parties, breakfast, or snacking. Let’s dive into the steps that will take you from gathering ingredients to enjoying these delicious little morsels.
Gather Your Ingredients and Tools
Before you start, it’s essential to gather all your ingredients and tools. Having everything in place will make your cooking experience smoother and more enjoyable.
Ingredients:
- 1 pound of ground beef, or your choice of protein
- 2 cups of Bisquick mix
- 1 cup of shredded cheese (cheddar works great)
- 1/2 cup of turkey bacon, cooked and crumbled (optional for added flavor)
- 1/2 cup of chicken ham, diced (great for extra protein)
- 1/4 cup of milk
- 1 teaspoon of garlic powder
- 1/2 teaspoon of onion powder
- Salt and pepper to taste
Tools:
- Mixing bowl
- Baking sheet
- Parchment paper or cooking spray
- Measuring cups and spoons
- Mixing spoon or your hands for combining
Preheat the Oven to the Perfect Temperature
Next, preheat your oven to 375°F (190°C). This step is crucial as it ensures that your Bisquick sausage balls will bake evenly and come out perfectly golden brown. To make this step even easier, you can set a timer so you don’t forget.
Mix the Sausage and Cheese with Bisquick
Now it’s time to mix it all together. In a large mixing bowl, combine your ground beef, Bisquick mix, and shredded cheese. Add the cooked turkey bacon and diced chicken ham if you’re using them. To enhance the flavor profile, stir in the garlic powder, onion powder, salt, and pepper.
As you mix, it helps to use your hands for this step; it’s a great way to ensure everything is well blended. If the mixture feels too dry, add the milk gradually until it holds together without being too sticky.
Form the Sausage Balls with Your Hands
Once your mixture is fully combined, it’s time to form the sausage balls. Take a small handful of the mixture (about one inch in diameter) and roll it into a ball between your palms. This step is where the fun begins! You can let your creativity run wild, making them a bit larger or smaller, depending on your preference.
Arrange on a Baking Sheet
Line your baking sheet with parchment paper or spray it lightly with cooking spray to prevent sticking. Place your Bisquick sausage balls evenly on the sheet, leaving a bit of space between them so they can expand while baking. It’s visually satisfying to see them all lined up like little savory soldiers, ready for their time in the oven!
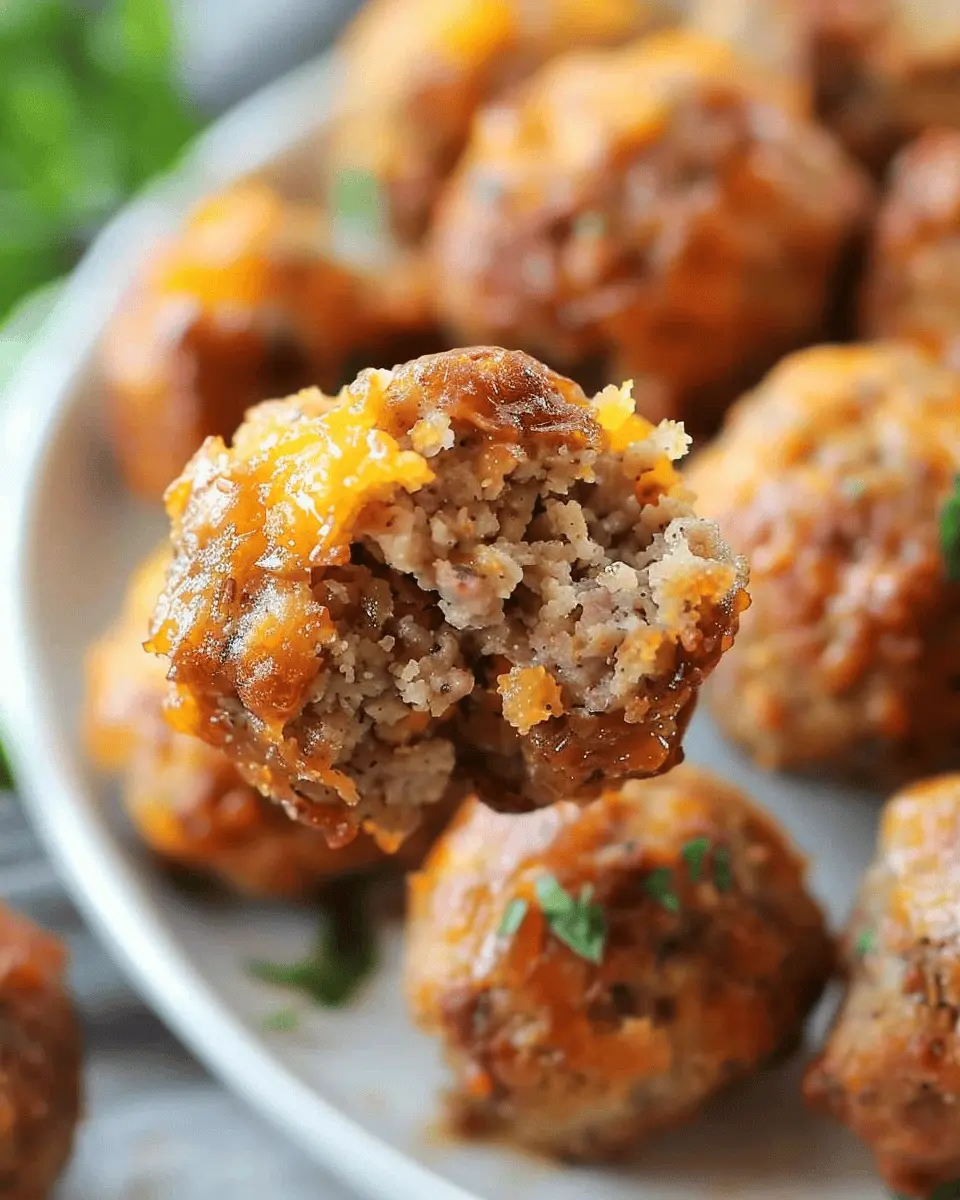
Bake and Enjoy the Aroma
Now that your Bisquick sausage balls are arranged, pop them in the preheated oven and let them bake for about 20–25 minutes, or until they’re golden brown and cooked through. As they bake, your kitchen will be filled with an irresistible aroma that will have everyone wondering what delicious creation you’re whipping up.
Don’t forget to check on them as they bake—this is a perfect time to sip on a refreshing drink, such as iced tea or lemonade, while you wait.
Once completed, let them cool for a few minutes, savor the moment, and then enjoy your delightful snacks warm from the oven.
With just a few simple steps, you’ve transformed basic ingredients into something truly special. These Bisquick sausage balls are sure to impress; feel free to share them at your next gathering or keep them all to yourself! For more tips on entertaining, check out The Spruce Eats and explore the endless possibilities of finger foods.

Variations on Bisquick Sausage Balls
Spicy Sausage Variations
If you’re looking to add a little heat to your Bisquick sausage balls, consider using spicy sausage or adding ingredients like crushed red pepper flakes or diced jalapeños. The beauty of these savory bites lies in their versatility. For an interesting twist, try combining beef sausage with a spicy chorizo for a full-bodied flavor. It’s perfect for those weekend brunch gatherings or game day parties! Don’t forget to dip them in your favorite hot sauce for an extra kick.
Incorporating Different Cheeses
Cheese lovers, rejoice! One of the fun aspects of making Bisquick sausage balls is experimenting with different cheeses. While cheddar is a classic choice, why not explore the rich and tangy notes of pepper jack or the sharpness of aged gouda? Mixing in cream cheese can yield a creamier texture and enhance the flavor. This can create a delightful assortment that caters to various taste buds. Just imagine the ooey-gooey goodness when you bite into a cheesy sausage ball!
Making Them Gluten-Free
For those of you with gluten sensitivities, fear not—the deliciousness of Bisquick sausage balls can still be enjoyed! You can easily substitute regular Bisquick for a gluten-free mix; there are several great options available in stores today. Similarly, ensure that the sausage you’re using is gluten-free as well, as some brands may contain gluten fillers. Trust us, with all the added flavor, no one will miss the gluten!
Feel free to get creative with ingredients and make these Bisquick sausage balls your own. Not only will they impress your friends, but they’re sure to become a family favorite!
Cooking Tips and Notes for Bisquick Sausage Balls
Tips for Perfecting the Texture
To achieve the ideal texture in your Bisquick sausage balls, here are a few tips to consider:
- Don’t Overmix: Combine the ingredients gently. Overmixing can lead to tough sausage balls. Aim for a light, fluffy finish that melts in your mouth.
- Keep Ingredients Cold: Use cold sausage (or turkey bacon) and cheese. This helps maintain the structure. Consider even chilling the mixture for about 30 minutes before baking for extra firmness.
Common Mistakes to Avoid
While making Bisquick sausage balls is straightforward, a few common pitfalls can trip you up:
- Skipping Seasoning: Don’t be shy with seasoning! Fresh herbs or spices such as garlic powder, onion powder, or even a dash of hot sauce can elevate your dish significantly.
- Ignoring Cooking Times: These little treats can go from perfect to overdone quickly. Always check for a light golden hue and firm center rather than relying solely on time.
For further tips and variations, check out this resource for inspiration!
Serving Suggestions for Bisquick Sausage Balls
Perfect Pairings: Dips and Sauces
When it comes to enjoying your Bisquick sausage balls, the right dip can elevate your snacking experience. Consider serving them with:
- Honey Mustard: A sweet and tangy delight that balances the savory flavors of the sausage.
- Ranch Dressing: This classic creamy dip adds a refreshing contrast to the rich, cheesy bites.
- Barbecue Sauce: For a smoky kick, a good barbecue sauce is a perfect match that adds depth to every bite.
Feel free to experiment by whipping up your own dips, like a zesty garlic aioli or a simple yogurt-based dip. The possibilities are endless!
Ideal Occasions for Serving
Bisquick sausage balls are incredibly versatile, making them perfect for various occasions, including:
- Game Day: They’re a crowd-pleaser, ideal for snacking during sports events.
- Potlucks: Easy to make and transport, these bites are a hit at any gathering.
- Weekend Brunch: Serve alongside fruity smoothies or a refreshing salad for a delightful start to your day.
Whether you’re hosting a party or enjoying a casual get-together, these savory snacks are sure to impress! Explore more ideas for serving and enjoying them in family-style settings here.
Time Breakdown for Bisquick Sausage Balls
When you’re whipping up Bisquick sausage balls, knowing how to manage your time can make all the difference, especially for busy young professionals like us! Here’s a quick breakdown to help you plan your culinary adventure.
Preparation Time
Getting everything ready for your Bisquick sausage balls takes around 15 minutes. Gather your ingredients and tools, and you’re well on your way to tasty goodness.
Cooking Time
The cooking magic happens in about 20 minutes. You’ll want to keep an eye on them until they reach a golden brown hue and smell irresistible—delicious!
Total Time
In just 35 minutes, you can have these scrumptious Bisquick sausage balls ready to serve. Perfect for a snack or party appetizer!
For more meal prepping tips, check out Meal Prep on a Budget and save time in the kitchen, allowing you more moments to enjoy these delightful bites with friends!
Nutritional Facts for Bisquick Sausage Balls
When whipping up some delicious Bisquick sausage balls, it’s good to know what you’re munching on. Let’s break down the nutritional values to help you enjoy these tasty bites mindfully.
Calories per Serving
Each serving of Bisquick sausage balls (about 2-3 balls) contains roughly 180 calories. This makes them a great snack or appetizer, perfect for any gathering without overwhelming your daily caloric intake.
Protein Content
Packed with protein, these sausage balls deliver about 10 grams per serving! This boost is perfect for those busy days when you need something quick to keep your energy levels up. Having a high-protein snack can help keep you feeling full longer, reducing those mid-afternoon cravings.
Sodium Levels
The sodium content in Bisquick sausage balls is approximately 400 milligrams per serving. While it gives them that savory flavor we all love, it’s important to be mindful, especially if you’re watching your salt intake. Opting for low-sodium varieties of turkey bacon or beef sausage can help you manage this better.
When making your Bisquick sausage balls, consider what ingredients you’re incorporating. You can always find extra tips on mixing up flavors and ingredients to suit your dietary needs here. Balancing health with deliciousness can be achieved—let’s enjoy those sausage balls!
FAQs about Bisquick Sausage Balls
When it comes to making Bisquick sausage balls, you might have some lingering questions. From prep time to storage, we’re here to clear up any confusion.
Can I make these sausage balls ahead of time?
Absolutely! You can prepare the mixture for Bisquick sausage balls a day in advance. Just combine all the ingredients, roll them into balls, and place them on a baking sheet. Then, cover and refrigerate until you’re ready to bake. This is a great time-saver if you’re planning for a weekend brunch or a last-minute gathering.
What’s the best way to store leftovers?
To keep your leftover Bisquick sausage balls fresh, allow them to cool completely. Then, place them in an airtight container. They will stay deliciously tasty in the refrigerator for up to three days. When you’re ready to enjoy them again, you can simply reheat them in the oven or microwave. For a quick snack, they also taste great cold!
Can I freeze Bisquick sausage balls for future snacking?
Yes, freezing is a fantastic option! To do this, arrange the uncooked sausage balls on a baking sheet and freeze until solid. Once frozen, transfer them to a freezer-safe bag or container. They’re great for up to three months in the freezer. When you’re ready to cook, you can bake them straight from the freezer—just add a few extra minutes to the cooking time.
For more tips on freezing and defrosting foods, check out this guide from the USDA here. Enjoy your Bisquick sausage balls anytime with these helpful storage solutions!
Conclusion on Bisquick Sausage Balls
Why You Need To Try These Today!
If you haven’t yet tasted the delightful Bisquick sausage balls, you’re missing out on a crowd-pleasing snack. These bite-sized wonders are incredibly easy to whip up and make for perfect appetizers at any gathering, whether it’s a game day or a cozy brunch with friends. Imagine the creamy, cheesy goodness paired with savory beef and a hint of spice—heavenly!
Not only do they satisfy those mid-afternoon cravings, but they’re also an engaging way to impress your guests. Plus, Bisquick sausage balls are versatile; you can customize them with your favorite ingredients. Ready to make this delightful dish? Dive into the kitchen and get cooking! For more great recipes, check out resources like Bon Appétit and Food Network.
PrintBisquick sausage balls: Easy Turkey Bacon and Chicken Ham Treats

Delicious and easy to make Bisquick sausage balls with turkey bacon and chicken ham, perfect for snacks or appetizers.
- Prep Time: 15 minutes
- Cook Time: 20 minutes
- Total Time: 35 minutes
- Yield: 24 servings 1x
- Category: Appetizer
- Method: Baking
- Cuisine: American
- Diet: Gluten-Free
Ingredients
- 2 cups Bisquick mix
- 1 pound turkey bacon, cooked and crumbled
- 1 cup chicken ham, diced
- 1 cup shredded cheddar cheese
- 1/2 cup milk
- 1 egg
Instructions
- Preheat the oven to 375°F (190°C).
- In a large bowl, combine Bisquick mix, turkey bacon, chicken ham, and cheddar cheese.
- Add the milk and egg, mixing until just combined.
- Shape the mixture into balls and place them on a baking sheet.
- Bake for 15-20 minutes or until golden brown.
- Remove from the oven and let cool slightly before serving.
Notes
- These can be made ahead of time and frozen for later use.
Nutrition
- Serving Size: 1 ball
- Calories: 120
- Sugar: 0.5 grams
- Sodium: 200 mg
- Fat: 8 grams
- Saturated Fat: 3 grams
- Unsaturated Fat: 4 grams
- Trans Fat: 0 grams
- Carbohydrates: 10 grams
- Fiber: 0 grams
- Protein: 6 grams
- Cholesterol: 30 mg
Keywords: Bisquick Sausage Balls, Turkey Bacon, Chicken Ham