
Introduction to Chocolate Thumbprint Cookies
When it comes to baking, few treats can ignite a sense of nostalgia like chocolate thumbprint cookies. These delightful confections are not only visually appealing but are also incredibly satisfying to make—and eat! If you’ve ever indulged in a rich, chocolatey goodness that melts in your mouth while adding a fruity or nutty surprise, then you’ve encountered the magic of these cookies.
Why Chocolate Thumbprint Cookies Are a Must-Try
So, why should you add chocolate thumbprint cookies to your baking repertoire? For starters, they are a wonderful fusion of flavors and textures. The exterior is slightly crisp, giving way to a soft, fudgy center that’s often filled with chocolate ganache, jam, or even a dollop of nut butter. This combination is undeniably irresistible.
But the magic doesn’t stop at flavor. Consider these appealing aspects:
-
Customizable Fillings: You can fill your thumbprint cookies with whatever your heart desires—chocolate, fruit preserves, or even a creamy filling! This makes them an excellent choice for accommodating different tastes and dietary needs, whether it’s a gluten-free version or a vegan alternative.
-
A Unique Presentation: The thumbprint creates a charming little indention that adds character and enhances the visual appeal of these treats. They can elevate your dessert table or make an impressive gift for friends and family.
-
Easy-to-Follow Recipe: Even if you’re a novice baker, chocolate thumbprint cookies are surprisingly simple to make. The steps are straightforward, and they don’t require fancy equipment. Just a few basic ingredients, a little time, and you’re well on your way to cookie bliss.
If you’d like some more baking inspiration or ideas for cookie variations, check out the American Institute of Baking.
A Personal Touch
I remember the first time I baked chocolate thumbprint cookies—they were for a holiday party, and I was nervous about impressing my friends. To my delight, not only did they vanish within minutes, but I also received multiple requests for the recipe. That experience made me realize the joy and connection that comes from sharing homemade treats.
So, grab your apron and let’s get started on this delicious adventure that will surely warm your heart and delight your taste buds!
Ingredients for Chocolate Thumbprint Cookies
Essential Ingredients for the Cookies
Making chocolate thumbprint cookies is not only a fun activity but also an adventure in creating deliciousness! Here’s what you’ll need to get started:
- 1 cup unsalted butter (softened to room temperature)
- 1 cup granulated sugar
- 1 cup all-purpose flour
- 1/2 cup cocoa powder (this will give those cookies their rich chocolate flavor)
- 1/4 teaspoon salt
- 1 teaspoon vanilla extract
- 1 large egg yolk
These simple ingredients combine to create a base that’s incredibly soft and delicious. And who doesn’t love a cookie that melts in your mouth? As you start to gather these essentials, consider checking out this comprehensive guide on baking basics for some extra tips!
Ingredients for the Chocolate Ganache
To elevate your chocolate thumbprint cookies, let’s whip up a luscious ganache that will be the cherry on top—well, metaphorically speaking!
- 1 cup semi-sweet chocolate chips
- 1/2 cup heavy cream
This ganache will not only fill the thumbprint but also add a glossy finish. Just imagine biting into a cookie with that smooth, rich ganache—it’s pure bliss! Looking for more inspiration on chocolate desserts? Websites like Serious Eats offer great insights and variations.
With these ingredients in hand, you’re well on your way to cookie heaven!
Step-by-Step Preparation of Chocolate Thumbprint Cookies
Making chocolate thumbprint cookies at home can be a delightful experience, perfect for impressing friends or simply indulging yourself. These rich, chocolatey gems filled with luscious ganache are not only delicious but also pretty easy to whip up. Let’s dive into the preparation process!
Gather and Measure Your Ingredients
Before you begin, ensure you have everything you need. This is where good preparation shines! Here’s what you’ll require:
-
Dry Ingredients:
-
1 cup all-purpose flour
-
1/4 cup cocoa powder
-
1/4 tsp baking powder
-
1/4 tsp salt
-
Wet Ingredients:
-
1/2 cup unsalted butter, softened
-
1/2 cup granulated sugar
-
1 large egg yolk
-
1 tsp vanilla extract
-
For the Ganache:
-
1/2 cup heavy cream
-
1 cup semi-sweet chocolate chips
Make sure to measure accurately; baking is a science, after all! You can check out this resource on proper measuring techniques from the Baker’s Association.
Prepare the Cookie Dough
Once you’ve gathered your ingredients, it’s time to mix! Start by creaming the softened butter and sugar together until the mixture is light and fluffy. This step makes a difference in your cookies’ texture!
- Add the egg yolk and vanilla to the butter and sugar, mixing until well combined.
- In a separate bowl, whisk the dry ingredients together. Gradually incorporate the dry mix into the wet mixture until a dough forms. Don’t overmix, or you might end up with tough cookies.
Isn’t it amazing how simple ingredients can come together to create something so delightful?
Shape the Cookies
With your dough ready, it’s time to shape it into cookies.
- Take about a tablespoon of dough and roll it into a ball.
- Place the balls on a parchment-lined baking sheet.
- Now, here’s the fun part: use your thumb (or the back of a spoon) to make an indentation in the center of each ball. This will hold your ganache later.
Feel free to invite a friend over—shaping cookies is a blast with good company!
Chill the Dough
Next, chilling your cookie dough is crucial for achieving the perfect texture.
- Cover the baking sheet with plastic wrap and pop it into the refrigerator for at least 30 minutes. This lets the dough firm up a bit, making it easier to handle.
While you wait, you can scroll through social media or catch up on your favorite podcast—this step is a great excuse for a little break!
Bake the Cookies
Ready to bake? Preheat your oven to 350°F (175°C) while you prepare the next steps.
- Bake the cookies for about 10-12 minutes. You want them to be slightly soft in the middle but firm on the outside.
- Once they’re out of the oven, let the cookies cool on the baking sheet for a few minutes before transferring them to a wire rack.
The aroma wafting through your kitchen will be irresistible!
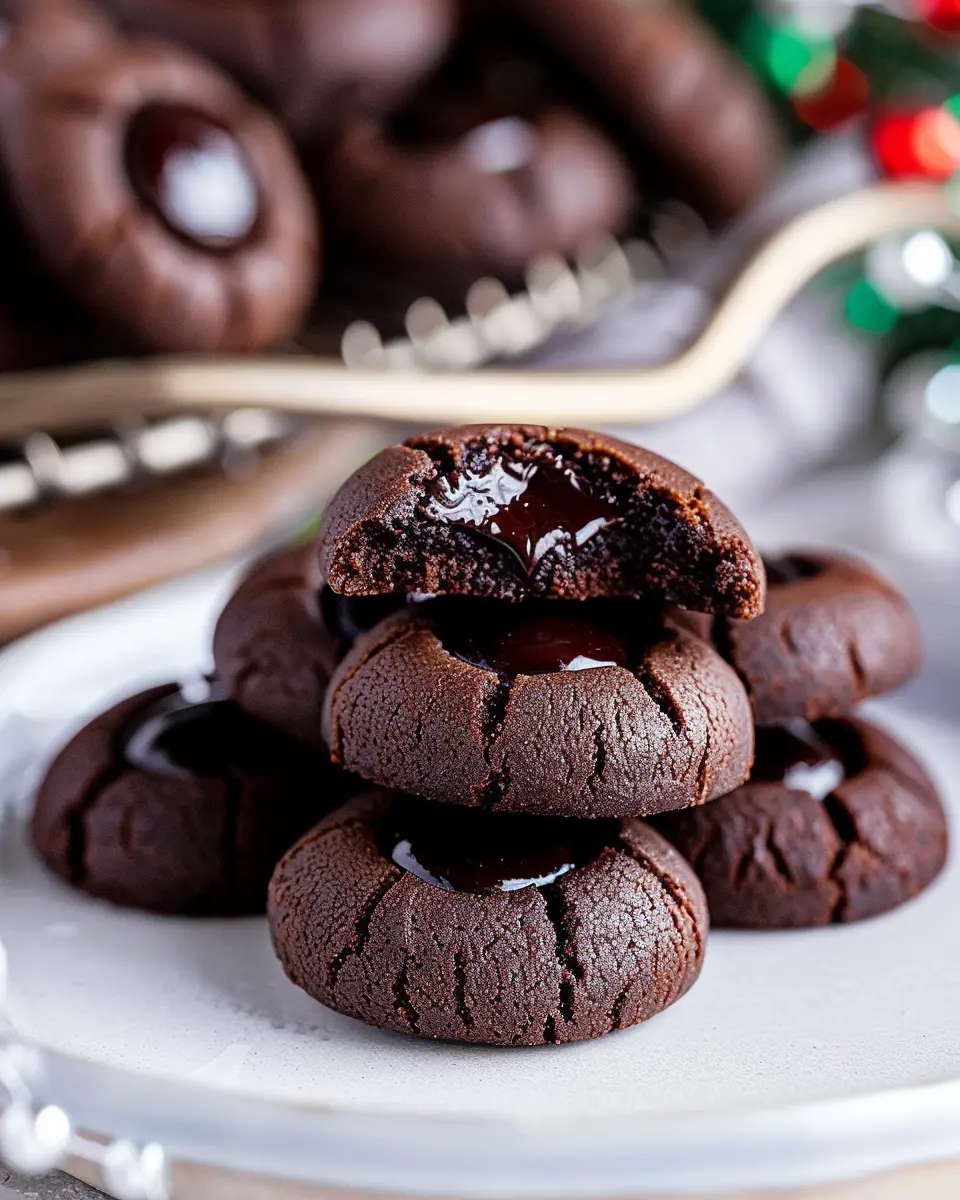
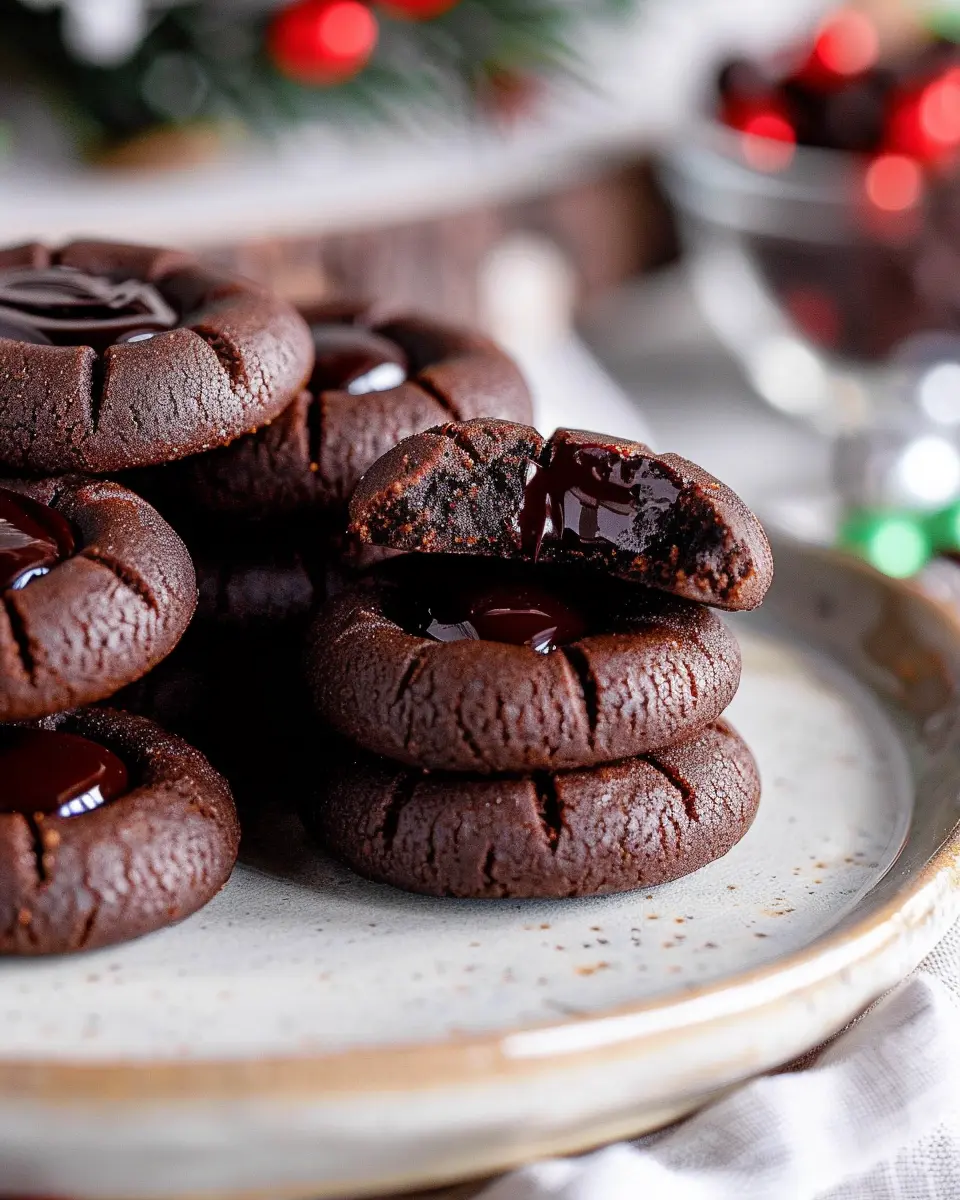
Make the Chocolate Ganache
Now onto the star component: the chocolate ganache! It adds a rich, creamy finish to your thumbprint cookies.
- In a small saucepan, heat the heavy cream over medium heat until just simmering.
- Remove it from heat and add the chocolate chips. Let it sit for a minute, then stir until smooth.
This silky ganache is a game-changer, bringing a luxurious touch to your cookies!
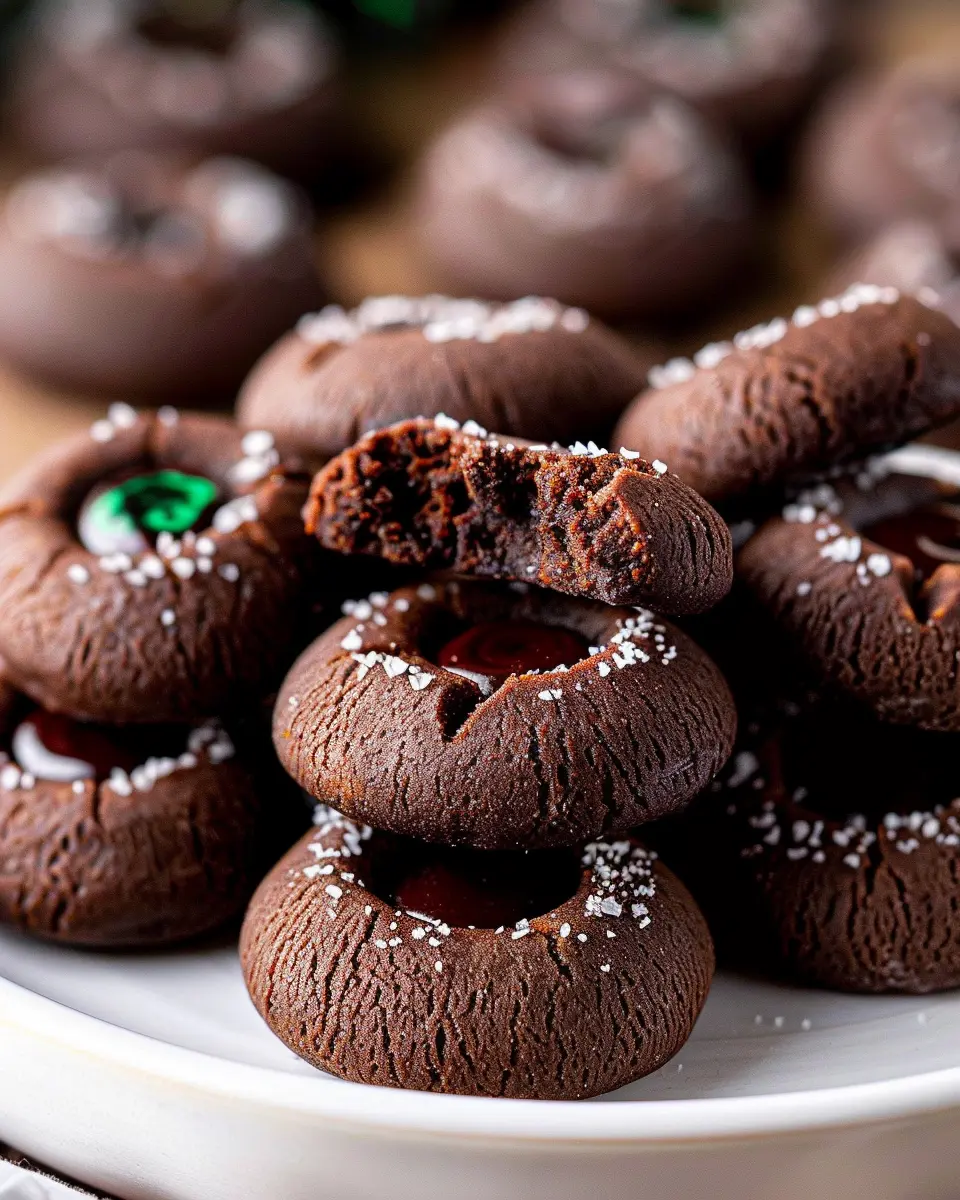
Assemble the Cookies
Finally, it’s time for the best part—assembly!
- Once your cookies have cooled completely, spoon a small amount of ganache into each thumbprint indentation. Let it set for a few minutes until it thickens.
And there you have it—your homemade chocolate thumbprint cookies! Perfect for sharing, but they might just disappear before you have a chance to offer any! Enjoy indulging in your delicious creation, and don’t forget to share your baking adventure with friends!
If you’re looking to make your baking habit a little healthier, consider swapping some ingredients with alternatives you can find in your pantry. Happy baking!
Variations on Chocolate Thumbprint Cookies
When it comes to chocolate thumbprint cookies, the possibilities are nearly endless! These sweet treats can be customized to perfectly fit your taste preferences and dietary needs. Here are a couple of variations to inspire your baking adventures.
Nutty Chocolate Thumbprints
If you’re a fan of crunchy textures, consider adding nuts to your chocolate thumbprint cookies. Simply fold in chopped nuts, such as walnuts, hazelnuts, or pecans, into your cookie dough. Not only do nuts complement the rich chocolate flavor, but they also add a delightful crunch. For an extra kick, try toasting the nuts beforehand! Need a fun twist? Fill the thumbprints with a nutty spread like almond or hazelnut, enhancing that rich, indulgent experience.
Gluten-Free Chocolate Thumbprint Cookies
Living gluten-free doesn’t mean you have to skip out on delicious treats! By substituting traditional flour with almond flour or a gluten-free flour blend, you can create delectable chocolate thumbprint cookies that everyone will love. Just mix the alternative flour into your batter, and watch as your cookies turn out wonderfully chewy and flavorful. To take it a step further, use a delicious fruit jam or chocolate ganache as a filling for a touch of decadence.
With these variations, your chocolate thumbprint cookies can cater to a variety of tastes and preferences. Happy baking! For more gluten-free tips, visit Gluten-Free Living and explore more nut-filled recipes on Nuts.com.
Baking Tips and Notes for Chocolate Thumbprint Cookies
Measuring Ingredients Accurately
When it comes to baking chocolate thumbprint cookies, precision is key. Use a kitchen scale for dry ingredients like flour and sugar to ensure consistency — it can make a significant difference in texture. Remember, even a tablespoon of flour too much can lead to dry cookies! Invest in a good set of measuring cups and spoons; they’re your best friends in the kitchen. If you’re unsure, check out this guide on ingredient measurement.
Ensuring the Perfect Ganache Consistency
The ganache is what makes chocolate thumbprint cookies shine, so achieving the right consistency is crucial. For a smooth and glossy ganache, use equal parts chocolate and heavy cream. Heat the cream gently until steaming, then pour it over chopped chocolate, letting it sit for a minute before stirring. If your ganache seems too thick, add a splash more cream and stir; if too thin, let it cool a bit more before using. This ganache tutorial can give you a visual reference too!
By applying these tips, you’ll be well on your way to baking the best chocolate thumbprint cookies ever!
Serving Suggestions for Chocolate Thumbprint Cookies
Pairing with Milk or Coffee
When it comes to enjoying your chocolate thumbprint cookies, nothing beats the classic pairing with a tall glass of cold milk or a rich cup of coffee. The creamy texture of milk beautifully balances the cookie’s chocolatey goodness, while a warm cup of coffee enhances the flavors, creating an indulgent experience. For a twist, consider trying flavored coffees, such as hazelnut or vanilla, to complement those rich chocolate notes. Have you ever experimented with different coffee blends? It’s a fun way to discover your perfect match!
Creative Serving Ideas for Parties
Want to impress guests at your next gathering? Serve your chocolate thumbprint cookies on a vibrant platter alongside a selection of toppings. Here are some engaging ideas:
- Dip Station: Set up a small bar with melted chocolate, caramel, and sprinkles for a DIY decorating experience.
- Diverse Dippers: Offer an array of nuts, fruits, and even Turkish delights for a twist on traditional serving.
- S’mores Style: Create a s’mores station with graham crackers and marshmallows—who wouldn’t love a chocolate thumbprint s’more?
Presenting your cookies creatively not only makes for a delightful dessert experience but also sparks conversation amongst your guests! For more fun serving ideas, check out The Kitchn for inspiration.
Time Breakdown for Chocolate Thumbprint Cookies
Preparation Time
Getting your kitchen ready for these delicious chocolate thumbprint cookies is effortless and only takes about 20 minutes! During this time, you’ll measure ingredients, mix your dough, and roll out those perfect little balls. It’s a great time to jam out to your favorite playlist or catch up on a podcast.
Baking Time
Once your cookies are prepped, pop them in the oven for roughly 12-15 minutes. Keep an eye on them, as oven temperatures can vary. The aroma will fill your kitchen and tempt your taste buds!
Total Time
From start to finish, you’re looking at approximately 35-40 minutes until you can indulge in these delightful treats. Perfect for a quick dessert or an afternoon snack! If you want to elevate your baking game, consider checking out more cookie recipes for variety and flavor inspiration.
Nutritional Facts for Chocolate Thumbprint Cookies
When it comes to treating yourself without the guilt, understanding the nutritional facts of your favorite treats can be enlightening. Let’s take a closer look at chocolate thumbprint cookies, exploring what goes into each delicious bite.
Calories
A typical serving of these cookies contains about 150-200 calories. While they make a charming addition to any dessert table, it’s important to enjoy them in moderation!
Sugars
With approximately 8-10 grams of sugar per cookie, these thumbprint delights certainly satisfy your sweet tooth. If you’re watching your sugar intake, consider sharing or saving a few for later!
Fats
These cookies have roughly 7-9 grams of fat each, primarily from ingredients like butter and chocolate. Opting for high-quality chocolate can enhance both flavor and overall nutritional value, keeping your indulgence balanced.
Incorporating mindful choices can transform your baking experience. For more insights on nutrition in baking, visit Healthline or The Nutrition Source. Happy baking!
FAQs about Chocolate Thumbprint Cookies
Can I make these cookies in advance?
Absolutely! Chocolate thumbprint cookies are perfect for making ahead of time. You can prepare the dough and refrigerate it for up to 3 days. When you’re ready to bake, simply roll the dough into balls and create the thumbprint before baking. If you prefer, you can even freeze the unbaked dough for up to three months. Just ensure you wrap it tightly to avoid freezer burn. When you’re set to enjoy fresh cookies, thaw the dough in the fridge overnight, shape them, and bake!
How do I store leftover cookies?
To keep your chocolate thumbprint cookies fresh and delicious, store them in an airtight container at room temperature. They typically stay tasty for about a week. If you live in a humid climate, placing a piece of bread in the container can help maintain moisture. For longer storage, freeze the cookies in a single layer, then transfer them to a freezer-safe bag. This way, you can enjoy a treat anytime!
What can I use instead of chocolate chips in the ganache?
If you’re looking to switch things up or don’t have chocolate chips on hand, there are several alternatives you can use for your ganache. Here are a few ideas:
- Dark Chocolate Bar: Chop it into small pieces for a richer flavor.
- Milk Chocolate: For a sweeter twist, use milk chocolate instead.
- Nut Butters: For a unique take, incorporate nut butters for a creamy finish.
For more tips on customizing your ganache, check out resources like Serious Eats or Food52. They have great insights on experimenting with flavors, so you can make these cookies truly your own!
By answering these common questions, we hope to make your chocolate thumbprint cookies baking experience enjoyable and stress-free!
Conclusion on Chocolate Thumbprint Cookies
Reflecting on the Joy of Homemade Cookies
Baking your own chocolate thumbprint cookies is a delightful experience that goes beyond just filling your kitchen with tempting aromas. It’s about creating something with your own hands, a tangible token of love you can share with family and friends. Each cookie is not just a treat but a little piece of happiness that sparks joy in every bite.
Have you noticed how homemade cookies seem to make even the most ordinary moments special? Whether you’re having a cozy night in or hosting a gathering, chocolate thumbprint cookies can be a charming centerpiece. Plus, they’re easily customizable! So, get creative and enjoy the process. For more inspiration and tips, check out resources like Serious Eats or America’s Test Kitchen to elevate your cookie-baking journey. Happy baking!
PrintChocolate Thumbprint Cookies: Easy Indulgence for Every Baker

Deliciously rich and satisfying, these Chocolate Thumbprint Cookies are perfect for any baking enthusiast.
- Prep Time: 20 minutes
- Cook Time: 12 minutes
- Total Time: 32 minutes
- Yield: 24 cookies 1x
- Category: Dessert
- Method: baking
- Cuisine: American
- Diet: vegetarian
Ingredients
- 1 cup unsalted butter
- 1 cup granulated sugar
- 2 large eggs
- 2 teaspoons vanilla extract
- 3 cups all-purpose flour
- 1/2 cup cocoa powder
- 1 teaspoon baking powder
- 1/4 teaspoon salt
- 1 cup chocolate chips
Instructions
- Preheat your oven to 350°F (180°C).
- In a bowl, cream together the butter and sugar until light and fluffy.
- Add the eggs one at a time, followed by the vanilla extract.
- In another bowl, whisk together flour, cocoa powder, baking powder, and salt.
- Gradually add the dry ingredients to the wet mixture, mixing until combined.
- Form the dough into small balls and place them on a baking sheet.
- Make an indentation in the center of each ball with your thumb.
- Press a chocolate chip into each indentation.
- Bake for 10-12 minutes, then cool completely.
Notes
- For best results, chill the dough before baking.
- Store in an airtight container for up to a week.
Nutrition
- Serving Size: 1 cookie
- Calories: 120
- Sugar: 10g
- Sodium: 50mg
- Fat: 7g
- Saturated Fat: 4g
- Unsaturated Fat: 2g
- Trans Fat: 0g
- Carbohydrates: 15g
- Fiber: 1g
- Protein: 1g
- Cholesterol: 30mg
Keywords: Chocolate Thumbprint Cookies